The Classic Editor is the default for older versions of WordPress. Newer versions, that default to the Gutenberg Editor, can gain access to the classic editor via plugin.
There are two different views the user can use: Visual and Text. A user is able to switch freely between the two by clicking the corresponding tab in the upper right.
The Visual View
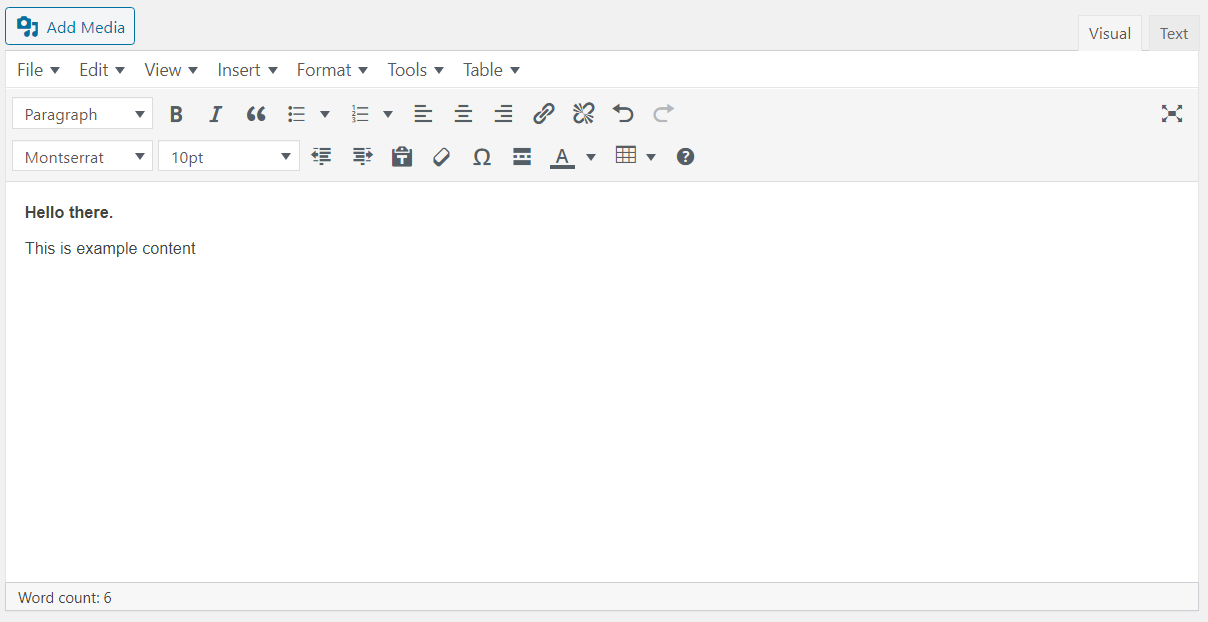
Generally, the editor will look similar to the example below. There might be a slightly different layout depending on what other plugins are activated on the site. For most users, this is the view they will want to work with.

The layout is relatively simple. The top includes all the layout and style options that similar text editors such as Google Docs or Microsoft Word provide. The bottom, blank area is where the content will go.
The Text View
This view shows the users the HTML version of their content. It is recommended to only use this view if the user is familiar with HTML code.

Inserting and Editing Links
To insert a link, simply highlight the text and hit the chain link button (located next to the text align options).
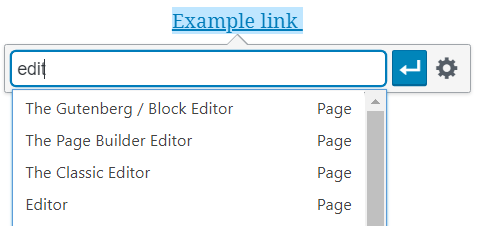
If linking to a page or post within the site, type in the name and WordPress will start listing possible options. Click one of those and its URL will be inserted.

If linking to an external URL, just type in the URL.
Click apply (the blue arrow button). The highlighted text will now be linked to that URL.
To edit an already existing link, click on the link and hit the Edit button (pencil icon). The link URL can now be changed. To edit in more detail, click on the Link Options button (gear icon).
Inserting and Editing Media
Media refers to all items in the Media Library.
To add an item, click the Add Media button at the top, or go to the Insert drop down option.
To edit a media item that has already been inserted, click on the media. Then, click the Edit button (pencil icon). Image details will pop up and allow for editing the image size, link, and other options. Make sure to hit the Update button when finished with the changes.